11 Tie-Dye Patterns: How to Perfect Any Design
Tie-dye is a fun and easy way to add color and pattern to fabric. You can tie dye almost any kind of fabric, from T-shirts to bed sheets, and the results are always unique.
While tie-dye patterns can seem complicated, most are quite easy to achieve. With a little practice and lots of 1-dollar T-shirts, you’ll be able to tie-dye anything in any color scheme you can imagine. Here are 11 exciting tie-dye patterns and how to perfect them!
1. Single Spiral
The single spiral is the most classic tie-dye pattern. You can distinguish it by its single, continuous spiral of color. To achieve this tie-dye pattern, start by folding your fabric into a tight coil. Then, tie a piece of string around the center of the coil to secure it. Dip your fabric into a bucket of dye, making sure to saturate it completely. When you rinse and unfold your fabric, you should see a single spiral of color.
2. Bullseye
To tie dye a bullseye pattern, lay your fabric on a flat surface and pinch it at the center, gathering the fabric into a thin cone shape. Then, place rubber bands around the cone, spacing them evenly apart. The number of rubber bands to use will depend on how many circles you want in your design.
Then, take each section of fabric between the rubber bands and apply a different color of dye. After letting each section sit in the dye, squeeze the rubber bands to allow the colors to blend slightly. Rinse the fabric in cold water and remove the rubber bands. You should now see a series of colorful circles.
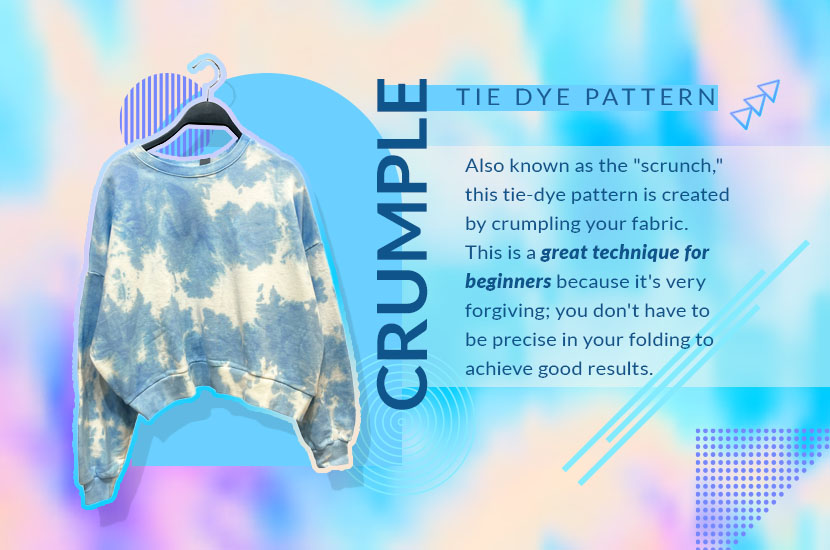
3. Crumple
Also known as the “scrunch” or “nebula,” the crumple tie-dye pattern is created by – you guessed it – crumpling your fabric. This is a great technique for beginners because it’s very forgiving; you don’t have to be precise in your folding to achieve good results. It’s also very versatile as you can create it using anything from bucket hats to backpacks to our simple white T-shirts for tie-dye.
To achieve a crumple pattern, start by scrunching up the fabric into a loose ball and applying rubber bands at random intervals. Then, dye the fabric according to your desired color scheme. You don’t need to be precise with the dye – just make sure that each section is saturated with some type of color. Once the fabric has been dyed, rinse it and remove the rubber bands.
Shop White T-Shirts for Tie Dye
4. Stripes
This tie-dye pattern is a simple but effective design. There are numerous variations of the pattern as the stripes can be diagonal, horizontal or vertical. To tie dye stripes, start by creating a series of accordion folds in the fabric. The folds should be alternated so that each one is pointing in the opposite direction. Be sure to fold the fabric in the direction you want the stripes to go.
After the fabric is folded, tie rubber bands around it to secure its shape, spacing them one to two inches apart. The number of stripes you end up with will depend on how many rubber bands you use.
Begin applying the dye, starting with the lightest color. Work your way from the outside of the fabric towards the center, applying a different color to each section between the rubber bands. Allow the dye to sit for a while before rinsing it out in cold water.
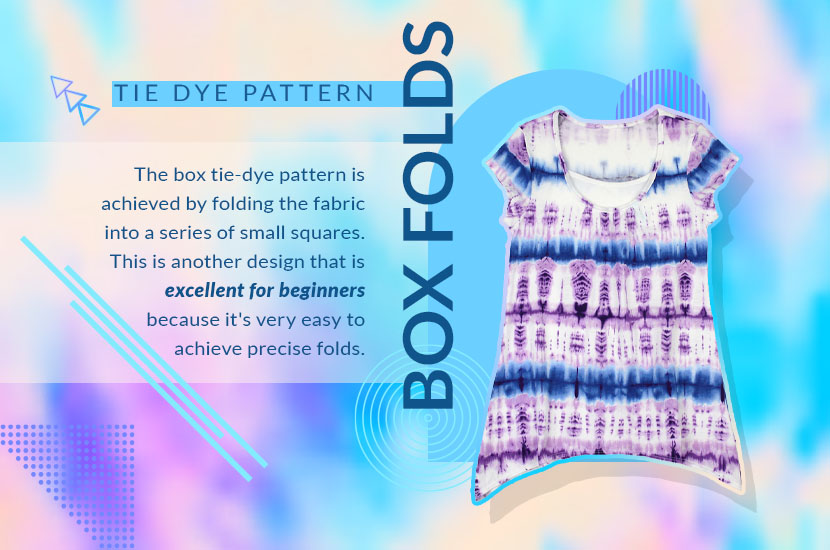
5. Box Folds
The box tie-dye pattern is achieved by folding the fabric into a series of small squares. This is another design that is excellent for beginners because it’s very easy to achieve precise folds.
To set up your box pattern, start by laying the fabric flat, then fold it lengthwise into accordion folds, moving left to right. Create sharp creases in the fabric by firmly pressing the edges of the folds. Next, apply this same folding technique widthwise, making sure that each fold matches the size of the lengthwise folds. When you are done folding, you should have a square-shaped bundle of fabric.
Before you begin applying the dye, place the square bundle between two square-shaped pieces of cardboard and wrap rubber bands around the edges to secure it. This will help keep your folds in place while you’re working.
You have two options for dying the bundle of fabric: dipping it into the dye or squeezing the dye onto the edges. Either way, you’ll want to make sure the fabric is thoroughly saturated. Once the tie dye is complete, rinse and remove the cardboard. You should see a series of squares with sharp, clean edges.
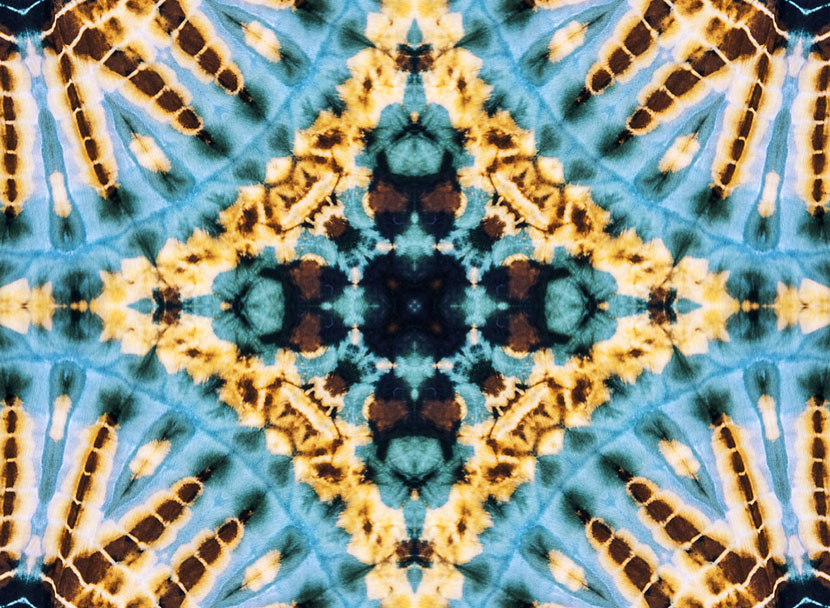
6. Mandala
The mandala, also known as the kaleidoscope, is one of the most intricate and beautiful tie-dye designs. And although it’s a bit more advanced than some of the other designs listed here, it’s fairly easy to master once you’ve had a little practice. Just be sure to stock up on some wholesale shirts so you can try again if needed!
To tie dye a mandala, start by folding your fabric into a wedge shape. This is done by folding it in half lengthwise and again widthwise. You’ll then need to fold it diagonally. Fold it diagonally once more before securing the shape with rubber bands. The placement of the rubber bands should depend on where you want each color to be and the desired size of each ring of color.
Once the fabric is folded, begin applying your dye. You can use as many colors as you want, but it’s best to stick with three or four. Work your way from the outside of the fabric towards the center, applying a different color to each section between the rubber bands. Be sure to flip the fabric over so that you can apply dye to the underside as well.
Allow the tie-dye to sit before rinsing it out in water. Removing the rubber bands should reveal a pattern that resembles a flower or a star.
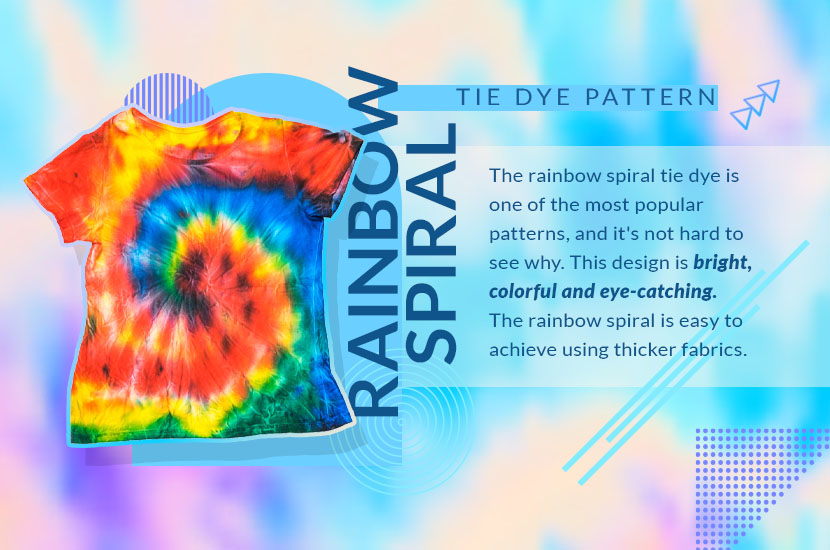
7. Rainbow Spiral
The rainbow spiral tie dye is one of the most popular patterns, and it’s not hard to see why. This design is bright, colorful and eye-catching. It’s also a great choice for beginners. And unlike most other patterns, the rainbow spiral is easy to achieve using thicker fabrics, such as our wholesale hoodies.
To achieve this pattern, lay your fabric on a flat surface and place your hand in the center before firmly twisting in a clockwise motion. As you twist, the fabric will begin to bunch up and form a spiral. Once the fabric is tightly spiraled, use rubber bands to secure it in place. The resulting bundle of fabric should be shaped like an irregular circle.
Now you’re ready to start applying the dye. Starting with the lightest color, apply each color to a uniform section of the fabric bundle. Flip the bundle over and apply the dye to the same sections of the underside. Once you’re finished, you should see a beautiful spiral pattern with each color clearly defined.
8. Zig-Zag
The zig-zag tie-dye pattern requires a fair bit of precision, but it’s definitely worth the effort. To achieve this design, start by folding your fabric lengthwise into at least three equal sections. Then, create a series of small diagonal accordion pleats, making sure that each fold is about the same width.
Once you’re finished folding, secure the fabric tightly with rubber bands, spacing them evenly along the length of the fabric. Using three to six colors, apply each color of dye to a different section of the fabric bundle between the rubber bands. Be sure to alternate the colors to create a uniform pattern. After rinsing the dye, you should see a series of large zig-zag lines running down the length of the fabric.
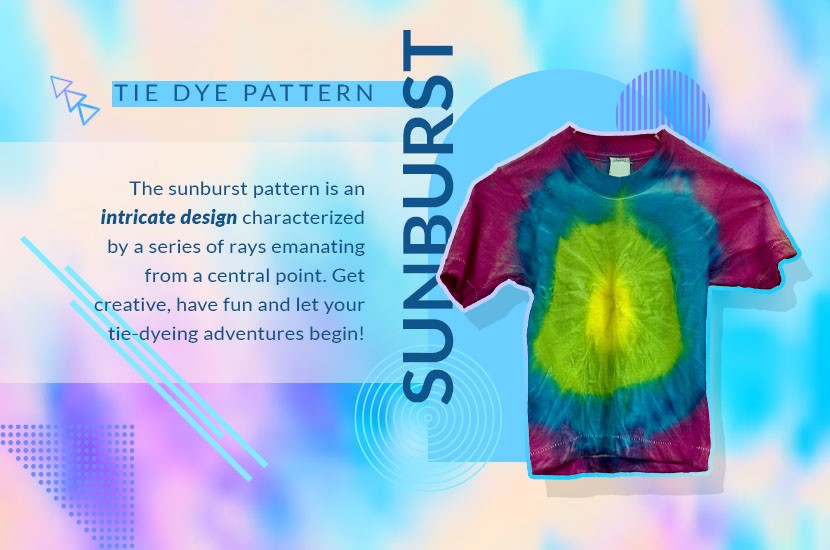
9. Sunburst
The sunburst pattern is an intricate design characterized by a series of rays emanating from a central point. To begin, fold your fabric in half lengthwise. Then, grab a small piece of fabric from the center of the folded side and gather both the top and bottom portions around it to form a cone-like shape.
As you create the cone shape, be sure to make small folds in the fabric to create a ruffled effect. Once you’re happy with the shape, tie the fabric securely with rubber bands across the length of the cone. Each one should be spaced relatively even, with about two inches between each band.
Now it’s time for the dye. You can choose from a variety of color schemes, but this pattern is a particularly great option for a monochromatic look. To achieve this, choose at least four shades of the same color. Starting with the lightest color, apply each shade of dye to a different section of the fabric cone. Alternate the colors as you work your way down the cone to create a gradient effect. Then, apply the darkest shade vertically in a band-like fashion between each color section.
Flip the fabric over, and let it sit for a few minutes to allow the dye to bleed through to the underside. Once the colors have bled through, take the darkest shade again and create horizontal bands of color across the length of the fabric. Allow the tie-dye to sit, rinse it out in cold water and unfold the fabric to reveal a series of rays radiating from the center.
10. Geodes
The geode tie-dye pattern is a great way to add some interest to a plain piece of fabric. To achieve this design, start by folding your fabric into a square shape. Then, tie the fabric tightly with rubber bands to create four equal sections. Once you’ve tied the fabric, dip it into a dye bath and allow it to soak for a few minutes.
After the fabric has had a chance to soak, remove it from the dye and rinse it out in cold water. You should see a pattern with four distinct sections, each of which is a different color. To create the geode effect, take a sharp object like a needle or toothpick and gently poke small holes into each section of tie-dye. The holes should be evenly spaced and relatively small.
Once you’ve made the holes, allow the tie-dye to sit for a while so that the colors can bleed together. Rinse and unfold the fabric to reveal a beautiful geode tie dye design.
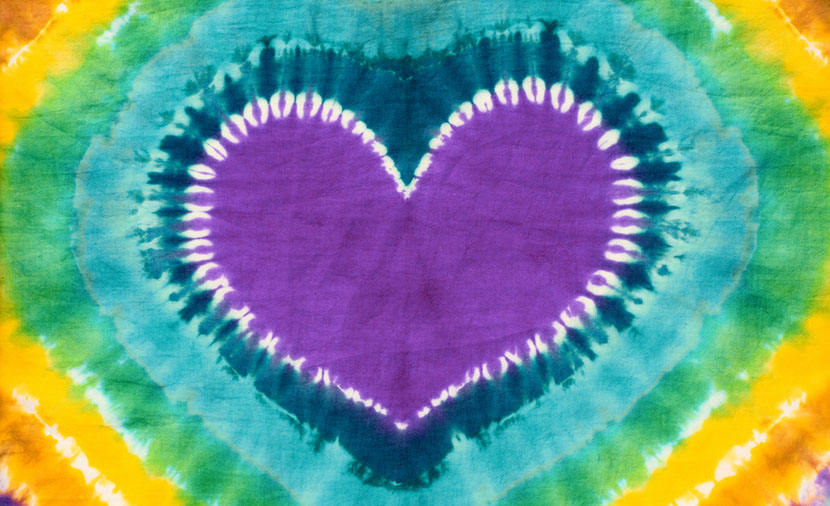
11. Heart
The heart tie-dye pattern is a great way to show your affection for tie-dye (or someone else). To get this design, start by folding the fabric in half lengthwise. On the folded edge, use a washable marker to draw a half-heart shape.
Next, fold small accordion pleats along the fabric, starting from the folded edge. The pleats should follow the drawn line of the heart, with the marker in a straight direction at the top of the folds. They should start fairly deep and get progressively shallower as you follow the curve of the heart.
Once you reach the end of the fabric, tie a thick rubber band around the fabric, placing it along the line. Then, add the dye to each section. The topmost color will end up being the color of the heart, so plan your colors accordingly!
Final Thoughts
These are just a few options from the endless array of tie-dye patterns that you can try out. Get creative, have fun and let your tie-dyeing adventures begin!
Image Credits
Sunward Art/Shutterstock.com
Green Leaf/Shutterstock.com
VLADIMIR VK/Shutterstock.com
Steve Collender/Shutterstock.com
Anastasiia Horova/Shutterstock.com
Neuevector/Shutterstock.com
nuwatphoto/Shutterstock.com
P-fotography/Shutterstock.com

Popular Posts
- Birthday T-Shirts Are Easy and Fun!
What better day to talk about birthday t-shirts than on your birthday?! Today is MY birthday and I love thinking...
- The 5 Most Popular T-Shirt Colors Are....
Being in the t-shirt, business we get asked this question all the time. What are the most popular t-shirt colors? No...
- What is a Lift Gate Delivery Service?
When you order bulk t-shirts online, your shipping charges are calculated using the weight of your shipment and your d...
Categories
- All Things Adair
- Branded Apparel
- Buying Guide
- Celebrate Holidays With T's
- Clothing Maintenance
- Colors
- Creative T-Shirt Ideas
- DIY
- Fabrics
- Fruit of the Loom
- Hats
- Helping the Community
- History of T-Shirts
- Learn About Our Products
- Matching T-shirts
- Polos
- Scrubs
- Style
- Sweatshirts
- T-Shirts in Sporting Events
- Team T-shirts
- The 411 on the T-Shirt Business
- Tie Dye
- Uncategorized
- Underwear
- Wholesale Apparel