3 Reverse Tie Dye Patterns to Try
When it comes to creating fun and fabulous looks that stand out for all the right reasons, you can never go wrong with tie dye. It has been a fashion staple for decades and does not show any signs of disappearing anytime soon. If you have been tie dyeing up a storm lately, you might be getting tired of the same old colors, patterns and techniques.
We have some excellent news for you! Reverse tie dye builds on traditional tie dye techniques and allows you to create vibrant and edgy designs on dark garments. There are several different patterns to try, and the only thing you will need aside from the usual tie dye supplies is some bleach. If you’re looking for a fresh new way to make tie dye shirts, keep reading to discover a few awesome reverse tie dye patterns to try!
Shop The Adair Group for Stylish Tie Dye Shirts
What Is Reverse Tie Dye?
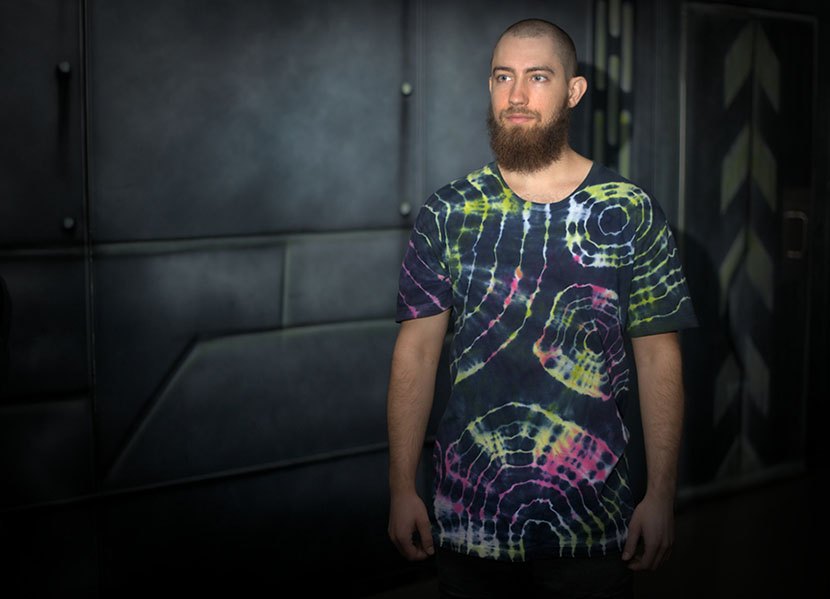
Source: Artist Photographer 3D/Shutterstock.com
Reverse tie dye is the process of “dyeing” black and dark-colored apparel using bleach instead of dye. Once the color has been removed, you can add color using your tie dye kit of choice. The process is simple, and the results are amazing! You’ll definitely want to stock up on bulk wholesale t-shirts to use for this technique.
Reversed Crumple
If you are looking for the fastest and easiest way to reverse tie dye a shirt, this one’s for you! The reversed crumple technique doesn’t require precise folds, and you don’t even need to tie the fabric if you don’t want to. Just dampen a dark-colored shirt, squeeze out the excess water, and scrunch it up into a crumpled pile. You can scrunch it up as loosely or tightly as you’d like. For tight crumples, secure the fabric with a few rubber bands.
Mix up a 50/50 solution of household bleach and water in a spray bottle. Spray all over both sides of the shirt, making sure to saturate the fabric. Then, let sit until the bleach does its magic. After 10 minutes, check your shirt to see how much the color has faded. Check back every five minutes until the fabric has reached the desired shade. Don’t let the bleach sit for more than 30 minutes, as it could damage the fabric. Keep in mind that the fabric likely will not fade to white. Instead, it will have an orangish hue in most cases.

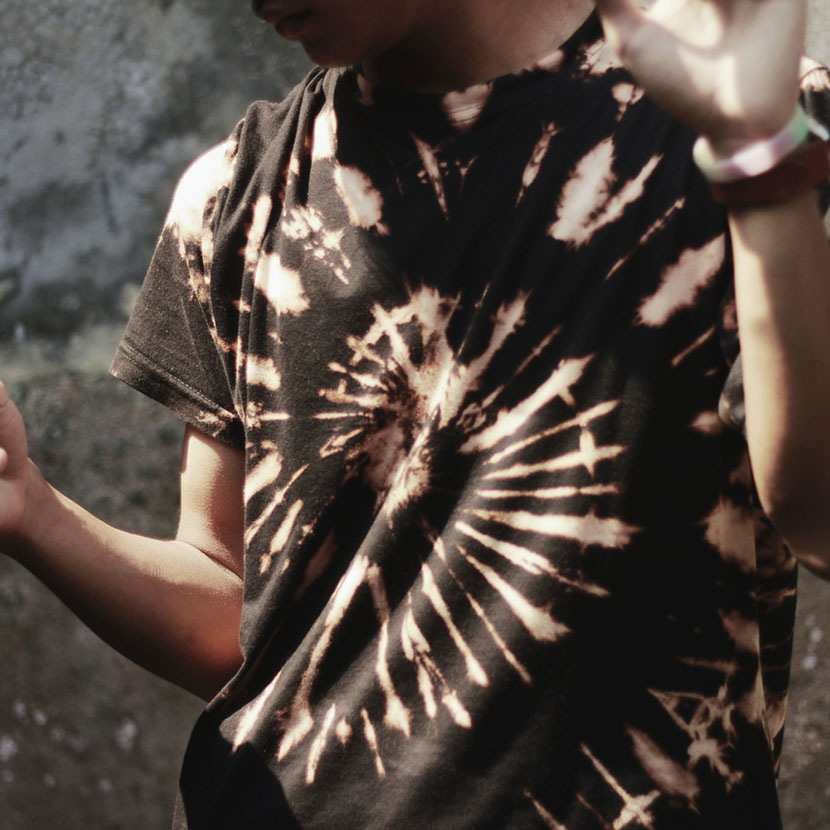
Source: Chaiyanunn/Shutterstock.com
If you used any rubber bands, remove them. Rinse your shirt thoroughly under cold running water, and then wash it in your washing machine. The next step is up to you. You can either wear your new shirt as-is or add color to the bleached areas using a tie dye kit.
Dark Rainbow
Lay a dark t-shirt out flat. Next, starting at one bottom corner, add rubber bands every couple of inches until you reach the opposite shoulder. Make sure the rubber bands are nice and tight! Then, apply a 50/50 bleach solution to the fabric. Let the bleach work its magic, and then remove the rubber bands and rinse and wash the shirt.
While still damp, spread the shirt out on a flat, protected surface. Use a tie dye kit to add color to the bleached sections. Remember the appropriate color order for an authentic rainbow look: red, orange, yellow, green, blue, indigo, violet. When finished with one side, flip the shirt over and dye the back. Place the shirt in a plastic bag and let sit overnight, and then rinse. Wash your shirt with gentle laundry detergent and hang it to dry.
Our Bulk Wholesale T-Shirts Are Perfect for Reverse Tie Dye
Reverse Spiral
Try making a reverse spiral tie dyed shirt if you want to put a new spin on an old classic. Start by laying a damp black t-shirt on a flat surface. Pinch the shirt, and then spiral the fabric around the pinched material. Press the fabric down as you go. The goal is to create a relatively flat disc. When finished, use rubber bands to secure the fabric and divide the disc into pizza-like wedges.
Source: Muhammad Rendra/Shutterstock.com
Blend one part water and one part bleach in a plastic bin that’s large enough for your shirt to fit in. Then, press the shirt down into the solution on one side, then the other. Take your time to make sure the fabric gets saturated.
Let sit for 10 to 30 minutes until the bleached areas fade to an orangish color. Remove the rubber bands, rinse and wash. Lay the still-damp shirt out on a flat surface and apply dye to the bleached sections. Repeat on the opposite side. Let sit overnight, rinse and then wash.
Conclusion
Reverse tie dye is a great way to take your skills to the next level. And once you’ve mastered the art of reverse tie dyeing t-shirts, try your hand at customizing other things like wholesale hats or hoodies.

Popular Posts
- Birthday T-Shirts Are Easy and Fun!
What better day to talk about birthday t-shirts than on your birthday?! Today is MY birthday and I love thinking...
- The 5 Most Popular T-Shirt Colors Are....
Being in the t-shirt, business we get asked this question all the time. What are the most popular t-shirt colors? No...
- What is a Lift Gate Delivery Service?
When you order bulk t-shirts online, your shipping charges are calculated using the weight of your shipment and your d...
Categories
- All Things Adair
- Branded Apparel
- Buying Guide
- Celebrate Holidays With T's
- Clothing Maintenance
- Colors
- Creative T-Shirt Ideas
- DIY
- Fabrics
- Fruit of the Loom
- Hats
- Helping the Community
- History of T-Shirts
- Learn About Our Products
- Matching T-shirts
- Polos
- Scrubs
- Style
- Sweatshirts
- T-Shirts in Sporting Events
- Team T-shirts
- The 411 on the T-Shirt Business
- Tie Dye
- Uncategorized
- Underwear
- Wholesale Apparel