How to Print T-Shirts at Home with an Iron – The Ultimate Guide

If you think that putting your own image on a t-shirt requires enlisting the assistance of a professional clothing customization company, think again! Whether you have a photo, a piece of artwork or any other type of image you’d like to add to a shirt, you can do it yourself using little more than your printer and a regular household iron. Designing your own apparel is fun, and this t-shirt decorating idea is one that is easy enough for absolute beginners to get right on the very first try. And once you’ve mastered the general technique, you can use it to customize a whole lot more than just t-shirts.
Learning how to print t-shirts at home with an iron takes just a few minutes, and in this guide for screen printing for beginners, we will be going over all of the tips and tricks to ensure your project turns out perfectly. Let’s get started!
Choose a Design
Chances are if you are reading this guide, you probably have an idea of what image you would like to use. Keep in mind, though, not all designs are ideal. To produce a high-quality shirt, you need a high-quality design. If the design is pixelated, too small or lacks detail, it isn’t likely going to look good on a shirt. Choose an image that is detailed, clear and crisp. While you can digitally edit your design, editing is no substitute for having a high-quality image in the first place.
Cheap Bulk T-Shirts Makes Customization Affordable
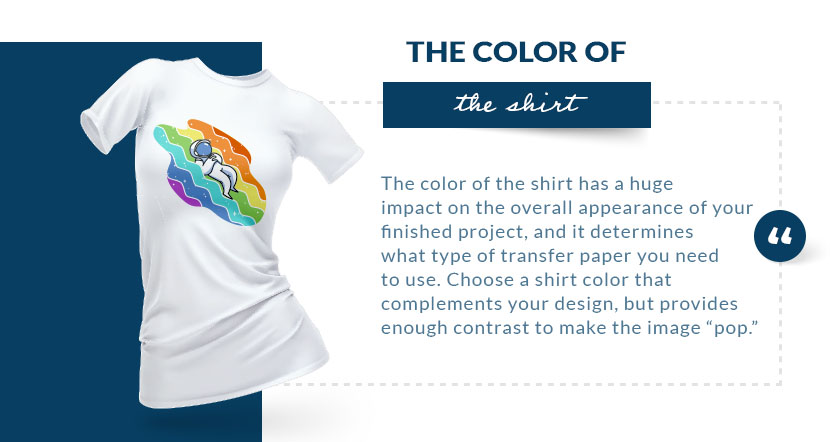
Decide on a Shirt Color
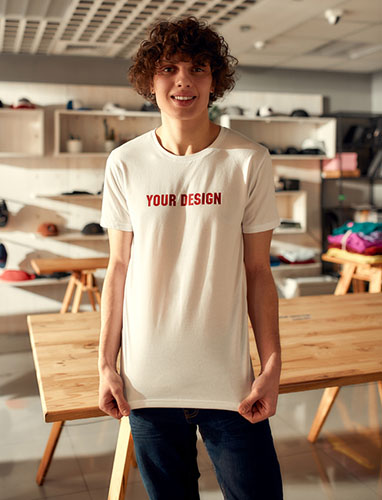
When it comes to printing designs on shirts, one of the most important considerations is what color shirt to use. The color of the shirt has a huge impact on the overall appearance of your finished project, and it determines what type of transfer paper you need to use (more on that in the next section). If your design mostly consists of light colors, it will get lost on a light-colored t-shirt. Likewise, dark images will get lost on dark shirts and tend to work best on blank white t-shirts. Choose a shirt color that complements your design, but provides enough contrast to make the image “pop.”
Consider investing in cheap bulk t-shirts rather than buying just a single shirt. When you buy from a wholesaler, it is often possible to get several shirts for as much as you’d expect to pay for a single shirt from a retailer. While this is an easy project and nothing should go wrong, buying in bulk means you’ll have extra shirts to fall back on in case your first attempt doesn’t turn out as you’d hoped. And if the finished product is as amazing as you hope, having extra shirts means you’ll have plenty of leftovers to use to make custom shirts for your friends and family.
Pre-wash to Prevent Shrinkage
T-shirts are notorious for shrinking. And when this happens after you’ve ironed on a photo, artwork or design, it can result in a distorted image. To avoid this problem, always pre-wash the shirt you plan on using. Wash and dry the shirt according to the laundering instructions on the tag. Do not use liquid fabric softener or dryer sheets, though, as these products can prevent the transfer from properly adhering to the fabric.
In addition to preventing shrinkage after the design has been applied, pre-washing gets rid of any dirt, oil and debris that may be on the fabric.
Purchase Transfer Paper
Using transfer paper is the easiest way to print t-shirts at home using an iron. If you want the project to turn out as you envision, though, you’ll need to purchase the right transfer paper. First, determine whether you need laser or inkjet paper. This is, of course, based on what type of printer you have. In most cases, you’ll want inkjet transfer paper, since most home printers are inkjet models. If you are using a laser printer, though, make sure you are using laser transfer paper to ensure safety and quality.
Next, you’ll need to determine whether you need transfer paper made for light-colored shirts or transfer paper made for darker shirts. The option for light-colored shirts is thinner and transparent. This makes the background clear. Keep in mind, however, that any white parts in your image will also be clear, which could be problematic. This type of transfer paper works best on white, but it is also appropriate for pastel-colored shirts.
Transfer paper for dark shirts is significantly thicker and has a white backing. This means that any white parts in your image will appear white on your finished shirt, too. It also means, however, that any background areas you don’t carefully trim away before ironing will be white on the shirt.
Cheap Polo Shirts Can Be Customized, Too!
Lastly, take the time to read the packaging to determine what types of fabric the transfer is meant to be used with. Not all transfers can be ironed onto all types of fabric, so this is extremely important. Most products are made to work with shirts made from cotton, polyester or cotton/poly blends. If your shirt is made from a different fabric, you may need to put some additional effort to find the appropriate brand of iron-on transfer paper.
Prepare Your Image
While you’ve already selected a high-quality image, you still need to do a bit of prep work with photo editing software. Doing so ensures it will look right on the finished shirt and can save you a lot of time and effort when it comes time to cut out your design.
First, load up your image in the photo editing program of your choice. You don’t need anything fancy, as long as the program has basic image editing capabilities. If your image includes text or any other elements that need to face a certain direction, the first thing you’ll need to do is flip it to create a mirror image. This ensures it will be facing the right direction after it’s been ironed onto the shirt.
Next, crop the artwork down to remove as much of the background as possible. Cut out anything you don’t want to be present on the finished shirt. Removing additional elements in your photo editing software can save you time from having to cut it out of the transfer with scissors by hand.
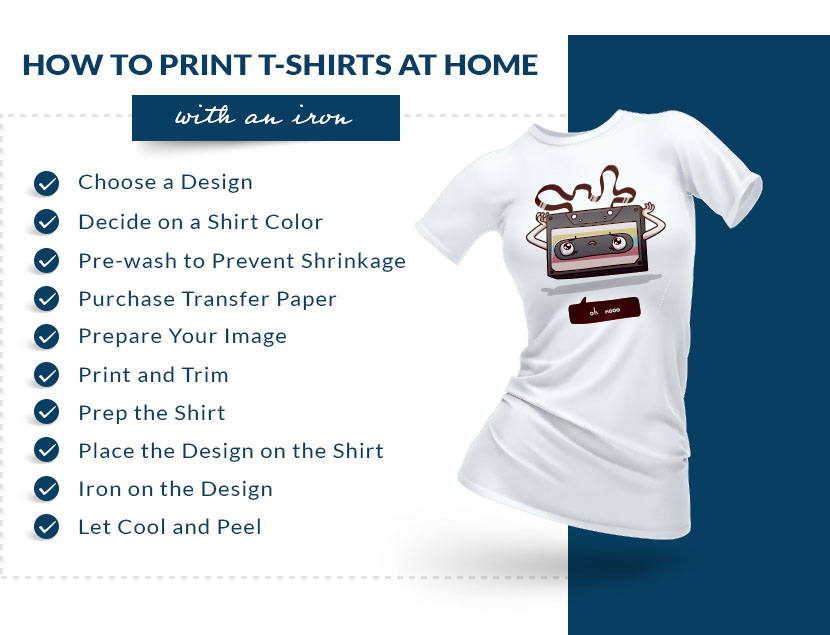
Print and Trim
Once you’ve prepared the image, it’s time to print. Before you click the “Print” button, though, take a few moments to read the instructions that came with your transfer paper. They will tell you what printer settings to use to ensure the best possible results. The instructions will also provide information on how to properly load the transfer paper into your printer. Spending a few minutes reviewing the instructions now can save you a lot of frustration later.
After printing, carefully cut out the image. Remember that any excess paper left around your artwork will be transferred to your shirt. If your design is complex, you may want to consider trimming around the edges using a craft knife, such as an X-acto knife, rather than scissors to ensure the cleanest results.
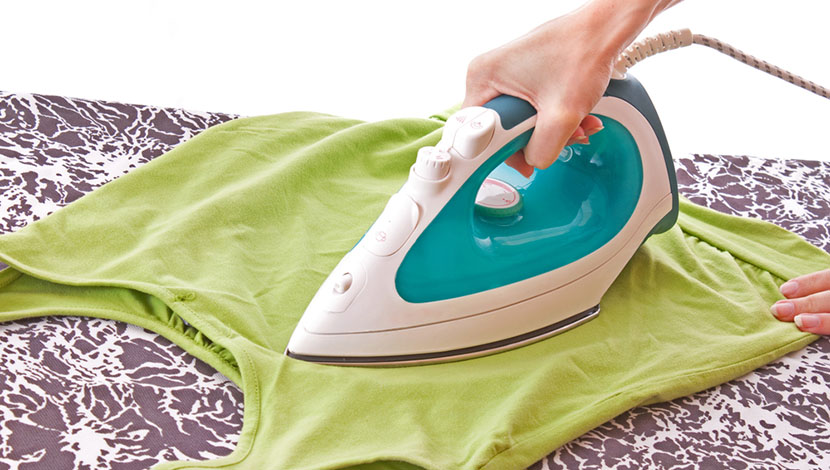
Prep the Shirt
Place your washed and dried t-shirt on a table, ironing board or another flat, heat-resistant surface. Smooth it out and then use your iron to remove any wrinkles or creases. Ironing also eliminates any excess moisture that may still be lurking in the fabric.
Place the Design on the Shirt
Peel the backing paper away from the transfer and set aside. Next, carefully position the transfer on your shirt. Take your time to ensure proper placement and that you’re happy with the location. Make sure it’s straight and that everything looks “just right.”
Now, use the backing paper you peeled off to cover the transfer. If the backing is made of plastic, place a kitchen towel or a piece of parchment paper over the transfer paper instead.
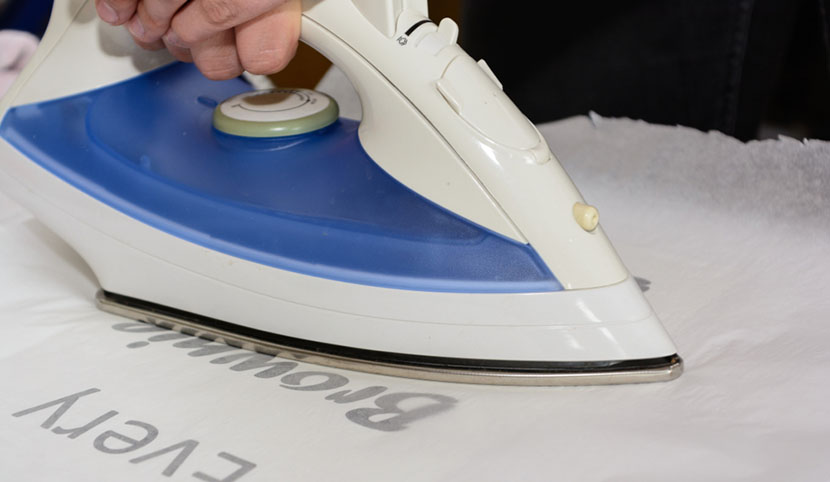
Iron on the Design
Check the transfer paper’s instructions to determine the appropriate heat setting for your iron and adjust accordingly. Once it has heated up, apply the iron to the design. Working from the center outward, move the iron in a circular motion. Apply a bit of pressure, but don’t press down with too much force. Continue moving the iron over the design in a circular pattern for as long as the transfer instructions recommend, typically three to four minutes.
Let Cool and Peel
Let the transfer cool completely and then carefully begin peeling up the transfer paper, parchment paper or towel. Start at a corner and check to make sure the design is not peeling away from the shirt. If it is, repeat the previous step.
If the design is staying on the shirt, continue carefully peeling until the entire image is revealed. Congratulations! Your new shirt is complete and ready to wear!
Take It to the Next Level
Now that you’ve learned how to print images on t-shirts using your iron, you can take your apparel customization game to the next level by trying your hand at adding designs to other types of garments. Using the same technique, you can now add your own photos or artwork to bulk polo shirts, hoodies, tote bags and just about any other fabric you can think of. You can use this technique to create one-of-a-kind gifts for your friends and family, make uniform tops for your employees to wear to work or even create clothing and accessories emblazoned with your artwork to sell to your loyal fans. Once you’ve mastered the basic technique, the options are endless!
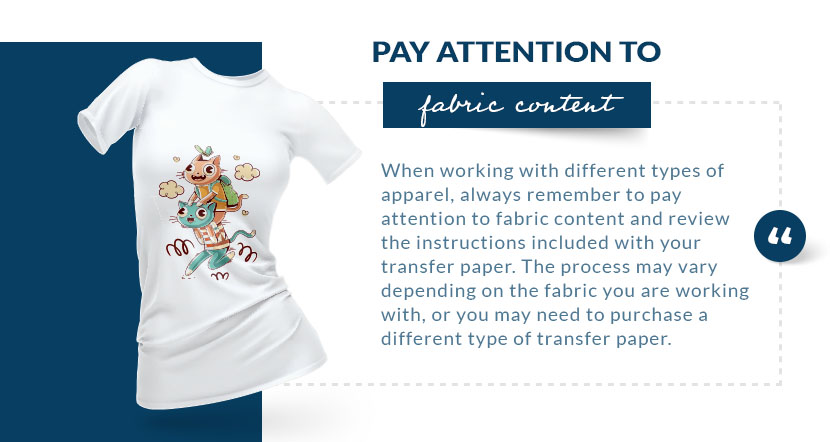
When working with different types of apparel and accessories, always remember to pay attention to fabric content and review the instructions included with your transfer paper. The process may vary slightly depending on what type of fabric you are working with, or you may need to purchase a different type of transfer paper. Checking the instructions is a vital step in making sure the finished project turns out right. More importantly, though, doing so ensures your personal safety.
Caring for Your Printed Apparel
To ensure the longevity of your transfer, wash garments with iron-on transfers inside out, and avoid dry cleaning. Use cold or warm water as opposed to hot to avoid damaging the transfer. Launder according to the instructions on the garment’s label, but don’t use a harsh detergent, bleach or fabric softener.
Hanging customized garments to dry is a safer bet than throwing them in the dryer. If you must use your dryer, though, be sure to use low heat. If it comes out wrinkled, avoid ironing directly on the transfer. The high heat will damage the transfer. If you have to iron over the design, place a towel between the transfer and your iron and use low heat.
Conclusion
Whether you’re trying to create a unique gift, need to customize shirts for your business or organization or just looking for a fun new project, printing t-shirts at home with an iron is both simple and affordable. And once you have mastered the basic technique, the only limit to what you can create is your own imagination. With iron-on transfer paper, you can create your own designs without spending a fortune on specialized equipment or professional printing services.
At The Adair Group, we have cheap bulk t-shirts that are perfect for this project. Whether you’re a beginner hoping to stock up on extras in case of mistakes or you’re a seasoned pro planning on making a lot of customized apparel, buying in bulk drastically lowers your costs and allows you to meet your goals. Start shopping for the supplies you need today!

Popular Posts
- Birthday T-Shirts Are Easy and Fun!
What better day to talk about birthday t-shirts than on your birthday?! Today is MY birthday and I love thinking...
- The 5 Most Popular T-Shirt Colors Are....
Being in the t-shirt, business we get asked this question all the time. What are the most popular t-shirt colors? No...
- What is a Lift Gate Delivery Service?
When you order bulk t-shirts online, your shipping charges are calculated using the weight of your shipment and your d...
Categories
- All Things Adair
- Branded Apparel
- Buying Guide
- Celebrate Holidays With T's
- Clothing Maintenance
- Colors
- Creative T-Shirt Ideas
- DIY
- Fabrics
- Fruit of the Loom
- Hats
- Helping the Community
- History of T-Shirts
- Learn About Our Products
- Matching T-shirts
- Polos
- Scrubs
- Style
- Sweatshirts
- T-Shirts in Sporting Events
- Team T-shirts
- The 411 on the T-Shirt Business
- Tie Dye
- Uncategorized
- Underwear
- Wholesale Apparel