How To Tie Dye T-Shirts
Tie dyeing, a beloved craft for centuries, continues to be a popular and creative activity today. Whether you’re a beginner looking to learn the basics of tie dyeing or an experienced artist looking to try out new tie dye techniques, this guide provides all the information needed to get started. From choosing the right colors to safely dying your shirt, we’ll help you create a colorful tie dye shirt you’ll be proud of.
What is Tie Dye?
Tie dyeing is a vibrant art form that involves folding, twisting, or tying fabric and then applying dye to create beautiful and colorful patterns. This ancient technique has been passed down for centuries, originating in diverse cultures like Japan, India, and Africa. Tie dyeing adds a personal touch to your clothing and helps you express your own style. Whether you prefer bold and bright colors or subtle and muted tones, tie dyeing is a versatile and fun way to create wearable art.
Tie Dye Patterns and Tie Dye Techniques
Tie dyeing isn’t just limited to one style or tie dye technique. There are numerous different tie dye patterns you can experiment with while creating different patterns and effects. Some popular types of tie dye techniques include:
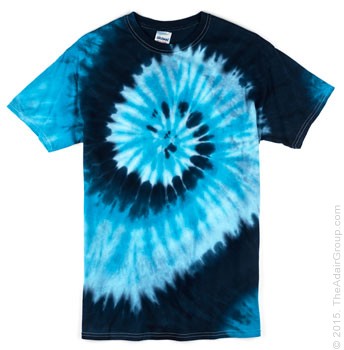
? Spiral: The spiral tie dye technique involves twisting the fabric from the center and wrapping it in a circular pattern, creating a beautiful spiral pattern that radiates outwards from the center of the fabric.
? Crumple: This technique is perfect for creating a more abstract and organic look. Simply crumple up the fabric and then apply dye randomly to create a unique and textured pattern.
? Shibori: Shibori is a Japanese tie dye technique that involves folding, twisting, or binding the fabric before dyeing. It creates intricate and repetitive patterns, often resembling the texture of water or waves.
? Ombre: Ombre tie dye is all about creating a gradient effect. Start by dyeing the fabric a light shade, and then gradually dip it into a dye bath in darker shades of the same color. The Ombre technique is perfect for creating a subtle and sophisticated look.
? Dip Dye: Dip dyeing is a simple yet effective technique. Simply dip the fabric into a dye bath, either partially or fully, to create a gradient effect. This technique allows more control over the color distribution and creates beautiful transitions between different hues.
Best Dye for Tie Dying
When tie dying t-shirts, using the best dye is key to achieving vibrant and long-lasting results. A tie dye t-shirt and kit are great options for beginners, as they usually come with all the necessary materials and instructions. Look for a kit that offers a liquid or powdered dye mixture and a variety of dye colors so that you can unleash your creativity and experiment with different combinations. Opt for fiber-reactive dyes that bond well with the fabric and provide vibrant colors that won’t fade easily.
Step-by-Step Guide to Tie Dying Clothing
Ready to start your tie dye project? From preparing your fabric to rinsing and wearing your newly tie dyed creation, this step-by-step guide will walk you through the process of tie dying clothing and help you create your own unique and vibrant designs.
1. Gather tie dye supplies
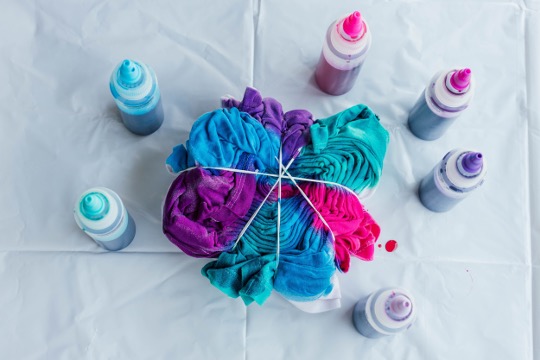
Before diving into the exciting world of tie dyeing, ensure you have all the necessary supplies. You’ll need a plain t-shirt or fabric, liquid dye or dye powder, rubber bands, plastic squeeze bottles or spray bottles for the dye, protective gloves, and plastic wrap or plastic bags to let the dye set. If you’re using a tie dye kit, it usually includes all of these supplies, making it convenient for beginners. Gather everything you need in one place so you’re ready to start creating your unique tie dye designs.
2. Mix the dye
Now that you have gathered all your supplies, it’s time to mix your dye and get creative! Start by preparing your dye according to the instructions on the package. This usually involves mixing a dye powder or liquid dye with water or a dye fixative. Make sure to wear protective gloves to avoid staining your hands. Once your dye is mixed, transfer it into plastic squeeze bottles or spray bottles for easy application.
3. Apply the dye
Now, it’s time to let your creativity shine! Take your squeeze bottles or spray bottles filled with your beautifully mixed dye and start applying it to your fabric. Use the rubber bands to create different sections or patterns on your fabric, and then apply the dye to each section. Get as creative as you want with your tie dye pattern — drip, splatter, or use stencils for a more intricate look. Be sure to cover all areas with the dye, but be mindful of not adding excess dye to avoid muddying the colors.
4. Rinse, wash, and wear your tie dye shirts
After patiently waiting for the dye to set, it’s finally time to rinse, wash, and wear your tie dye creation! Rinse your fabric thoroughly under cold water to remove any excess dye. Avoid using warm water to rinse, as that can cause the colors to bleed. Keep rinsing until the water runs clear. Once rinsed, wash your tie dye separately in the washing machine using a mild detergent. This will help remove any remaining dye and ensure your colors stay vibrant. After washing, let your tie dye dry completely before proudly showing off your unique and colorful creation to the world.
How to Tie Dye Shirts – Frequently Asked Questions
What Other Items Can You Tie Dye?
When it comes to tie dyeing, there are a variety of items that you can dye and experiment with. While t-shirts are the most popular choice, don’t limit yourself to just clothing! You can also learn how to tie dye socks, pillowcases, bandanas, or even canvas shoes. The key is to choose items made of natural fibers like cotton, as they absorb the dye the best.
How Do You Tie Dye a Rainbow Spiral Shape?
To tie dye a rainbow spiral shape, start by laying your t-shirt flat and pinching the center of the fabric. Twist the fabric in a clockwise direction, creating a spiral shape. Use rubber bands to secure the fabric in place, making sure to create sections of rubber bands for each color of the rainbow. Apply your dye colors to each section of the fabric, starting from the center and working your way outward. Let the dye set according to the instructions, remove the rubber bands, rinse, and reveal your vibrant rainbow tie dye spiral design!
How Do You Wash Tie Dye and Stop It Fading?
To properly care for your tie dye shirt and prevent fading, follow a few simple steps. Start by turning the shirt inside out before washing it to protect the vibrant colors. Use cold water and a mild detergent to gently clean the fabric. Avoid using bleach or harsh chemicals, as they can strip the dye. When it comes to drying the dyed fabric, opt for air drying or using a low heat setting on the dryer. Avoid exposing your tie dye shirt to direct sunlight for long periods, which can cause fading.
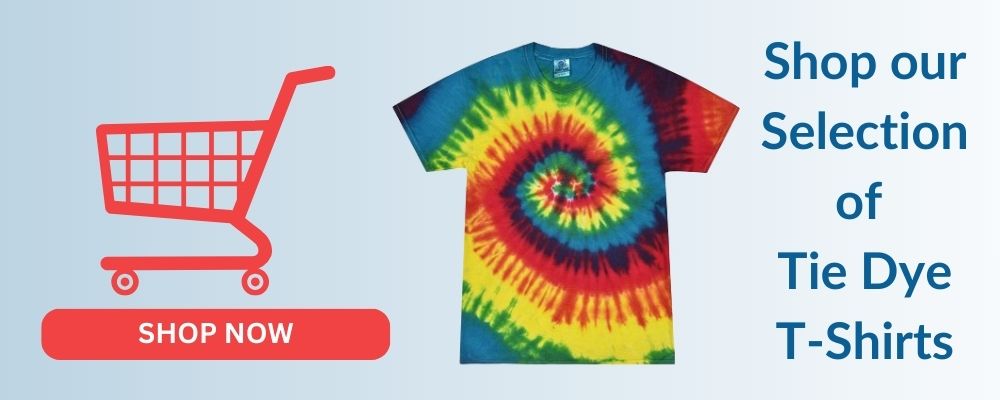
Buy Pre-Dyed Tie Dye Shirts From The Adair Group
Looking for pre-dyed tie dye shirts to add to your collection? Look no further than The Adair Group! With a wide range of vibrant and unique designs, you’re sure to find tie dye shirts to suit your style. Our pre-dyed shirts are made with high-quality materials and expertly dyed to ensure long-lasting colors that won’t fade. Whether you’re looking for white shirts with a classic spiral design or a bold and colorful pattern, The Adair Group has you covered with tie dye t-shirts for adults and tie dye t-shirts for kids.

Popular Posts
- Birthday T-Shirts Are Easy and Fun!
What better day to talk about birthday t-shirts than on your birthday?! Today is MY birthday and I love thinking...
- The 5 Most Popular T-Shirt Colors Are....
Being in the t-shirt, business we get asked this question all the time. What are the most popular t-shirt colors? No...
- What is a Lift Gate Delivery Service?
When you order bulk t-shirts online, your shipping charges are calculated using the weight of your shipment and your d...
Categories
- All Things Adair
- Branded Apparel
- Buying Guide
- Celebrate Holidays With T's
- Clothing Maintenance
- Colors
- Creative T-Shirt Ideas
- DIY
- Fabrics
- Fruit of the Loom
- Hats
- Helping the Community
- History of T-Shirts
- Learn About Our Products
- Matching T-shirts
- Polos
- Scrubs
- Style
- Sweatshirts
- T-Shirts in Sporting Events
- Team T-shirts
- The 411 on the T-Shirt Business
- Tie Dye
- Uncategorized
- Underwear
- Wholesale Apparel