Screen printing shirts is a fun and creative way to personalize your clothing. You can make interesting and unique prints with just a few dollars’ worth of supplies and some cheap t-shirts.
What you’ll need:
- Transparency Paper
- Screen
- Photo emulsion kit
- Cardboard
- Fabric ink in the color of your choice
- A 150 watt bulb and hanging socket
- Lukewarm water with low pressure
- Wiper or squeegee
- Piece of white paper
- Ironing board
- Iron
How to Screen Print
To start with, create your design. Best practices recommend that your design be no more than 9” by 15”, in order to fit on the shirt properly.
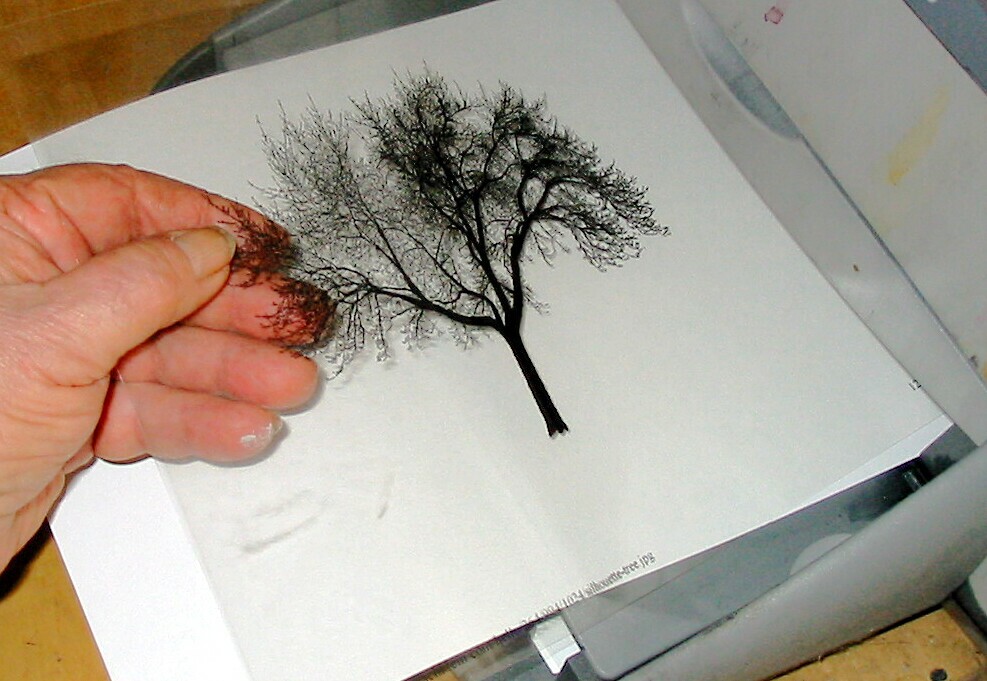
Image on transparent paper. From rockaloid.com
The next thing you’ll need to do is copy your design onto transparent paper, like the transparency screens people used on overhead projectors. You can either do this yourself, or have a copy store to do this for you. Put the transparent sheet up against a white background to make sure that this print looks exactly the way you want it to: what’s on the transparency sheet is the image that will be transferred to your shirt.
For the next step, you’ll need a screen and a photo emulsion kit. You can either buy one pre-made from an art store, or make one yourself. For directions on how to make your own screen, click here. Spread photo emulsion gel across the screen and let it dry. Then take your transparent print and press it against the screen. Expose the print and screen to a light– ideally, a 150 watt bulb in a hanging socket works best– so that the emulsion gel will bind. Be sure that the transparent print is between the screen and the light: the emulsion gel will bond to the screen in the negative space of the design, where you don’t want ink to be.
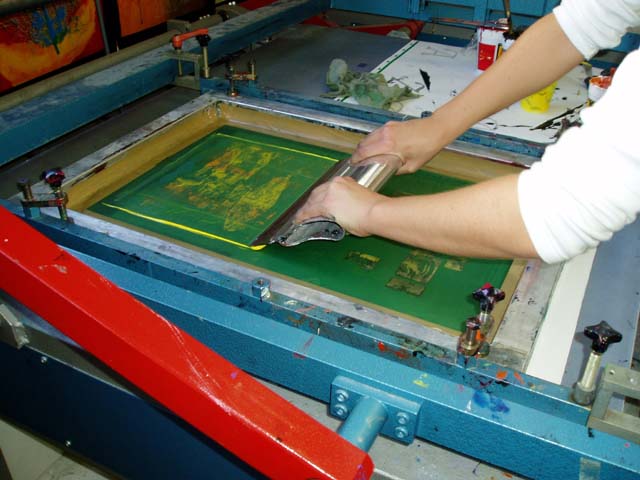
Screen printing process. Image from ideasworkshops.com
After you have exposed the screen, you’ll need to spray it down with lukewarm water at a low water pressure. Once your screen has dried, place a piece of cardboard inside your shirt, and position your screen carefully where you want the design to be. Make sure that the fabric has no wrinkles below the screen. Then, pour your ink across the top of the screen. Using your wiper or squeegee, pull the ink from the top to the bottom of the screen, then back up from the bottom to the top. When you lift the screen, your image should have transferred on the tee shirt.
When you are satisfied at how your image has transferred, hang the screen-printed tee to dry. Once the ink has dried fully, lay the t shirt on an ironing board, place a clean piece of white paper over the print, and iron for three to five minutes on each side. Set the iron to the highest heat that won’t scorch the fabric or the paper. The heat will set the design on the shirt and make the ink withstand washing. Once you’ve finished, congratulations! You have screen printed a t shirt.
